Below, I will guide you on how to use OmniBridge to transfer any ERC20 token from Ethereum to xDai.

OmniBridge and OmniBridge UI are Beta testing software, you can access it here.
Why switch from Ethereum (ERC20) to xDai (STAKE)?
Transaction fees on the Ethereum network are currently very high and always reach ATH (the average is always close to $50 for a task).
xDai (STAKE) has many advantages:
- xDai (STAKE) is a blockchain on layer 2 technology designed for stable transactions.
- Fast transaction time (5 seconds) and low transaction fees (500 tx with $0.01).
- Operates on the Proof-of-Stake mechanism.
- Has a developing ecosystem: BlockScout Explorer (similar to Etherscan but for xDai), storage wallets,…
- Smart contracts and DApps on xDai are compatible with Ethereum-based chains.
This is the xDai ecosystem
For example, BlockScout is used to retrieve tasks on xDai Chain, similar to Etherscan.
Hakka Finance is one of the projects that has migrated from ERC20 to Binance Smart Chain thanks to the xDai network.
You can read the article here if you are interested in Hakka
Finance: Easy guide to transfer Hakka to BSC.
Guide to transfer tokens from Ethereum (ERC20) to xDai (STAKE)
In this example, coinrin will transfer Basic Attention Token (BAT) tokens from Ethereum (ERC20) to xDai.
- Access OmniBridge at : https://omni.xdaichain.com
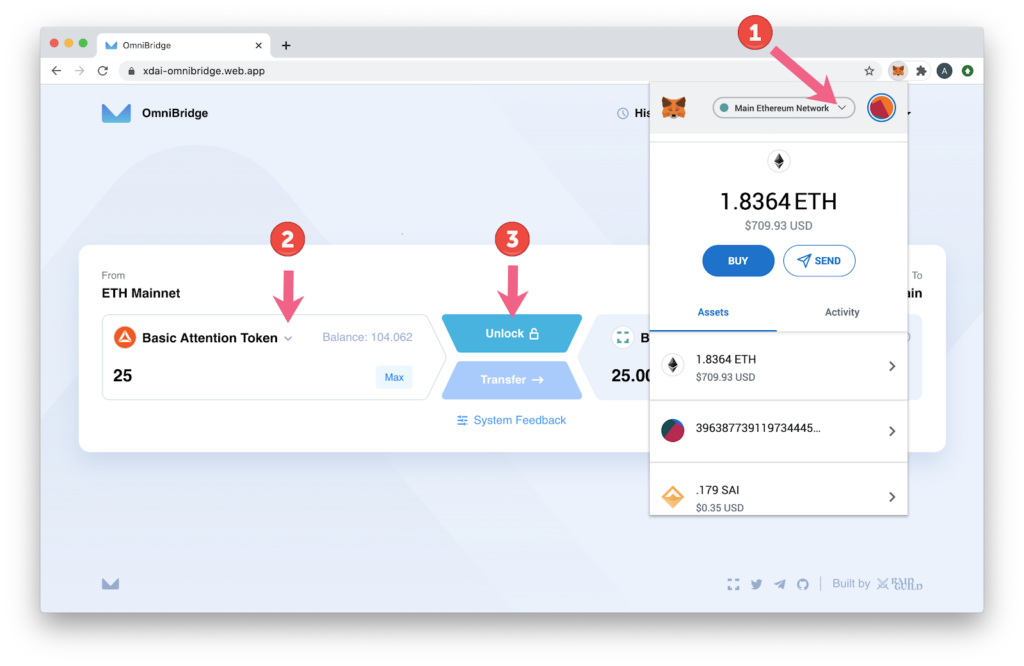
- Connect your MetaMask to the Ethereum Mainnet.
- Select the token you want to transfer (here we choose BAT) and enter the amount.
- Click Unlock to approve account interaction.
See also: Metamask Wallet: Guide to installing and using Metamask
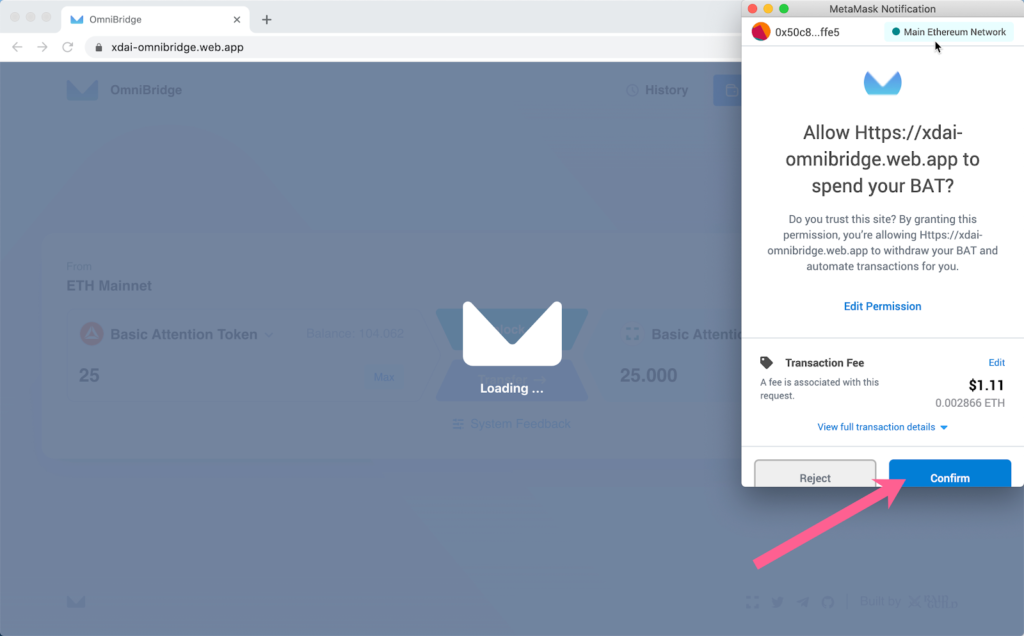
2. Confirm the transaction to approve the Omnibridge.
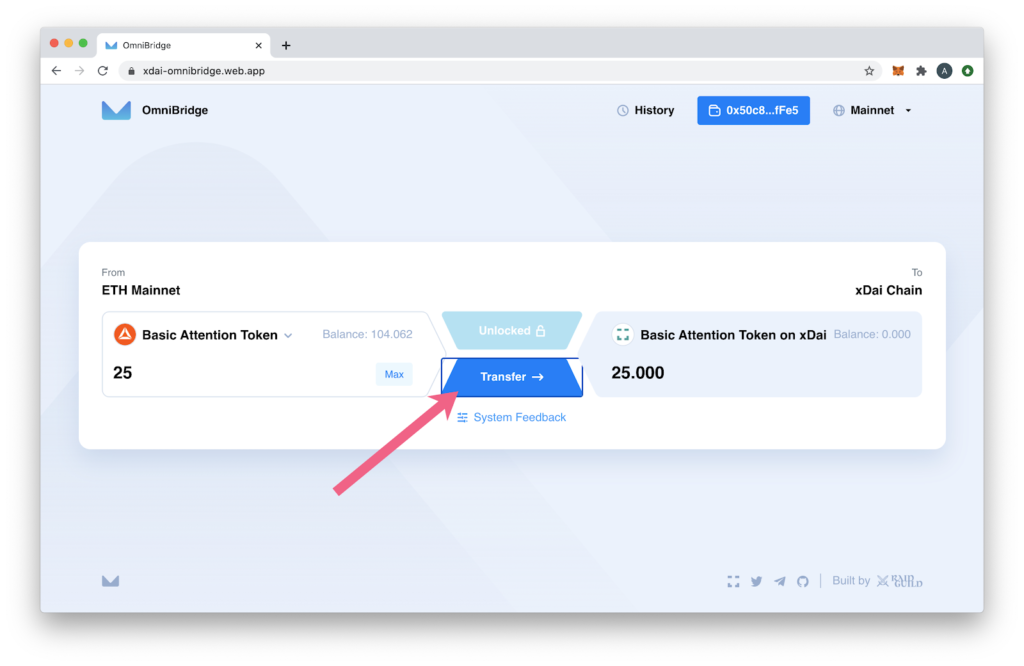
3. After the approval TX is complete, you can now transfer BAT to BAT on xDai. Click Transfer.
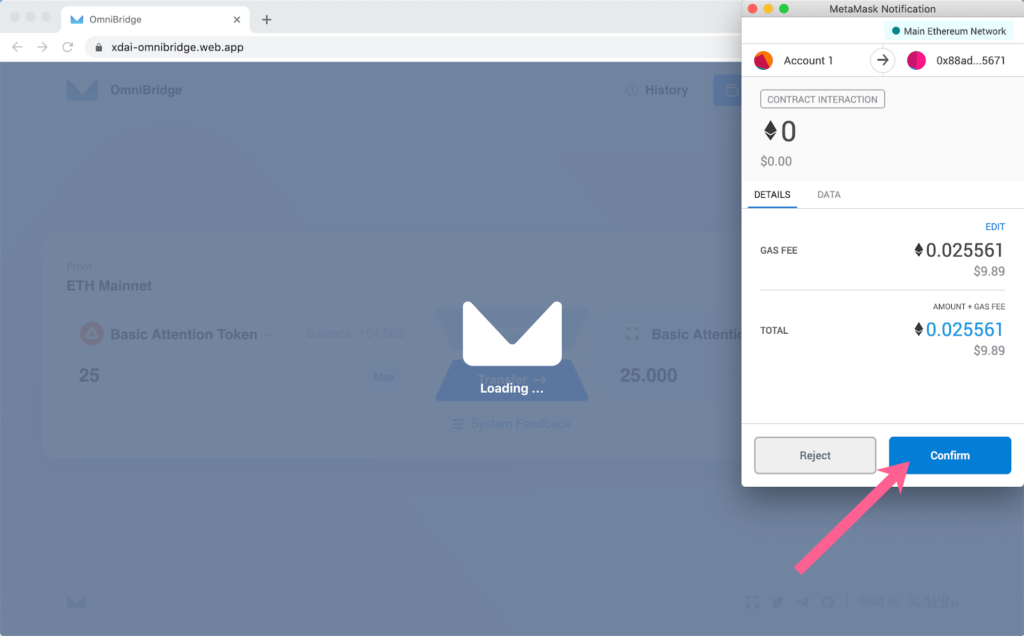
4. Click Confirm to approve the transfer and pay the gas fee. You should check the gas fee to optimize the transaction cost.(https://ethgas.watch/)
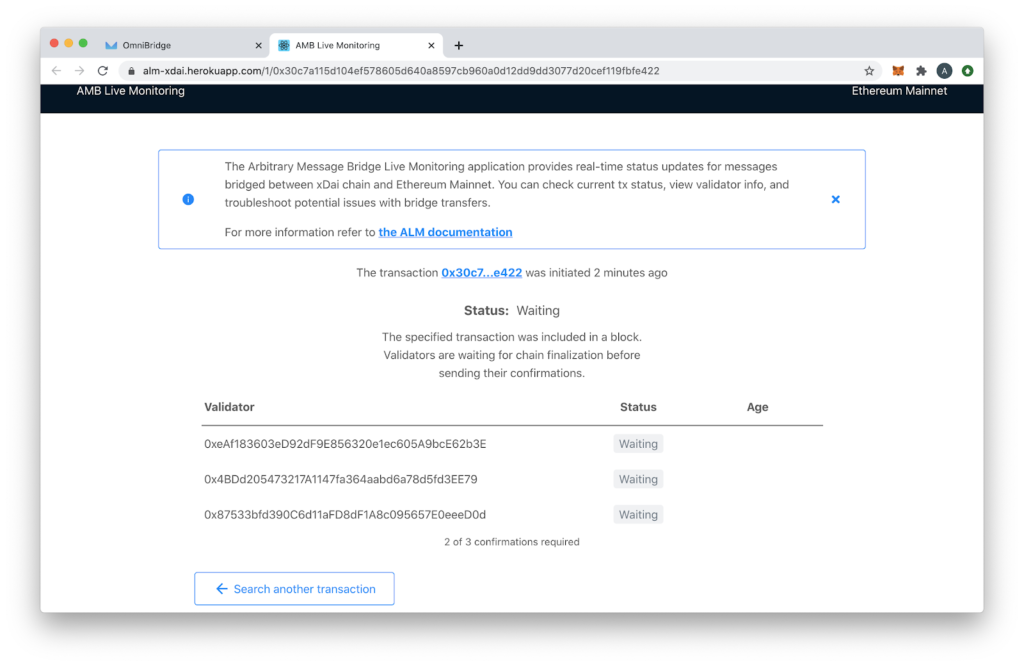
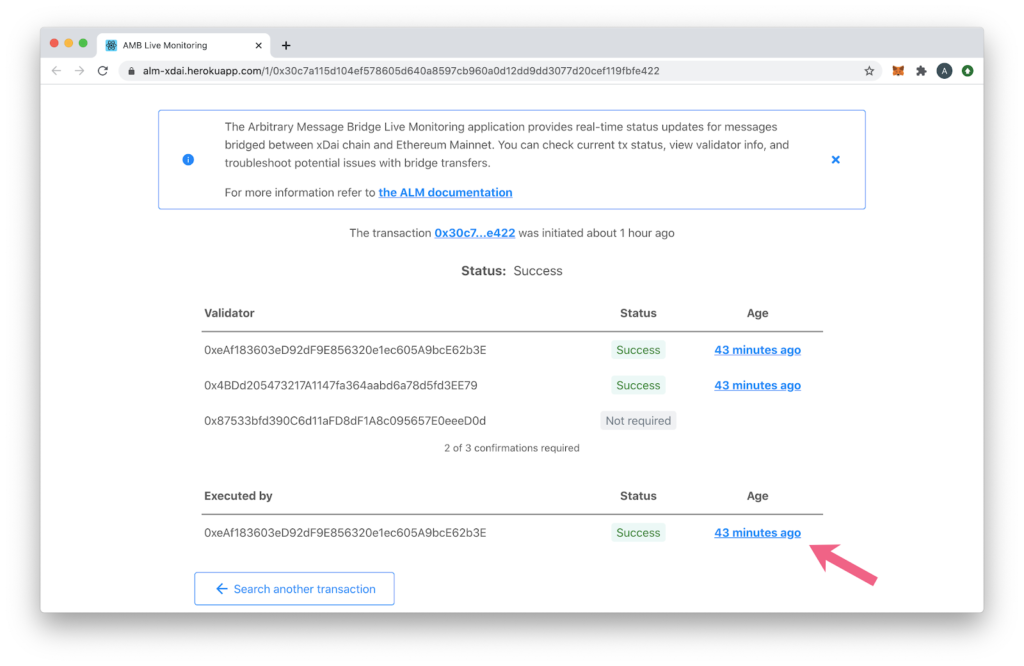
5. The cross-chain transaction will begin processing. While waiting for block confirmation, you can click to track the transfer status.

6. The transfer will be processed in ALM. (The task is successful after 2 approvals from the validator)
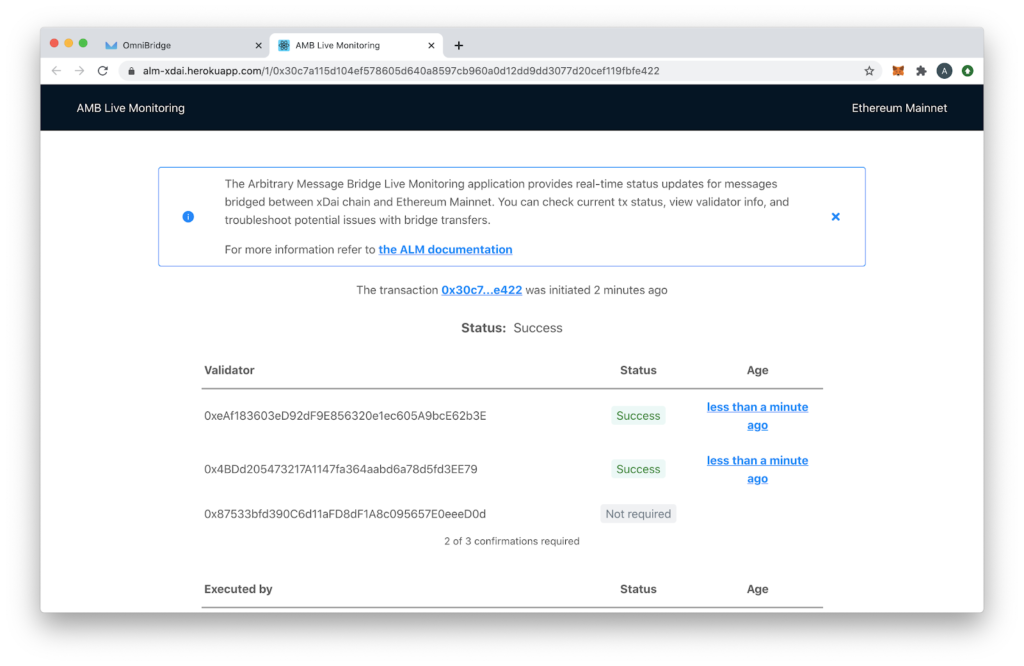
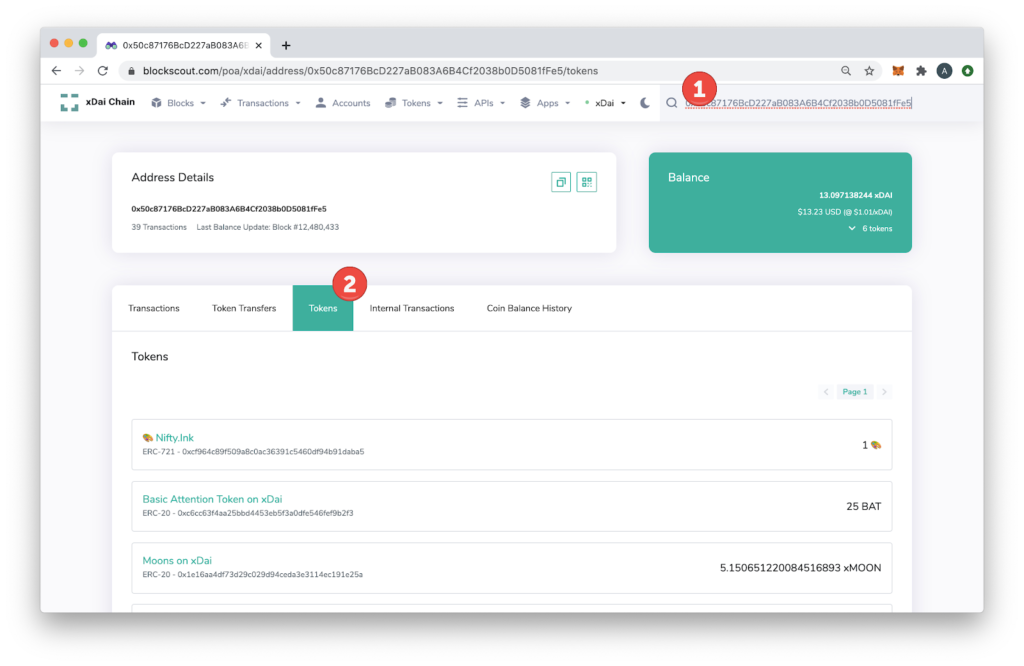
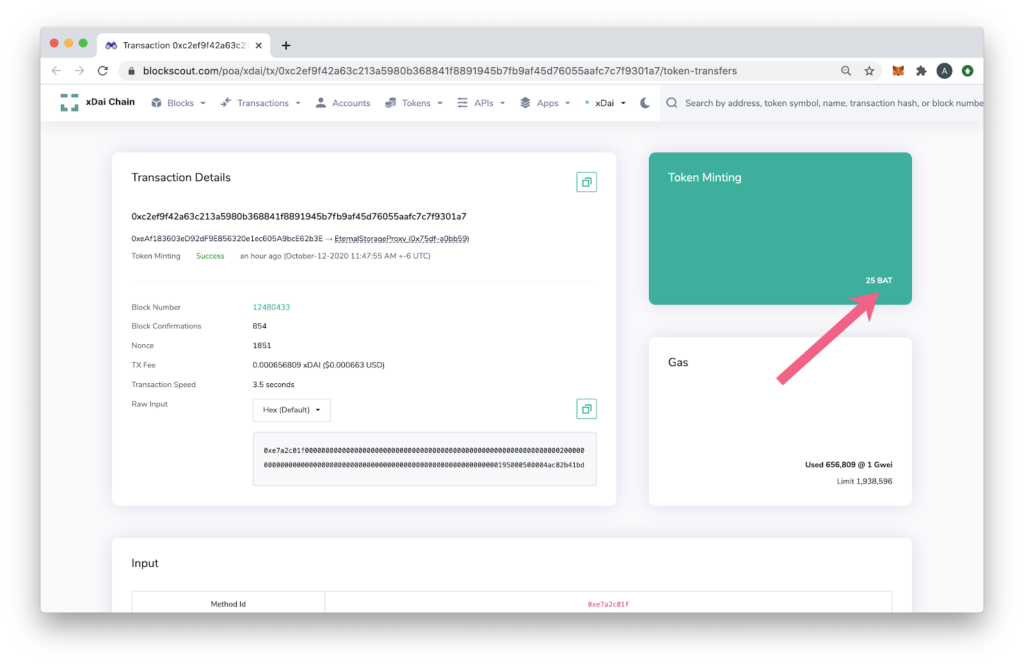
7. After the transfer is successful, you can check the tokens on BlockScout to see if they exist. Check the Bridged tokens here.
- Before the transaction.

- After the transaction.

Adding New Tokens to MetaMask on the xDai Chain
Switch the chain on your Metamask to the xDai chain.
Now that you’ve bridged to xDai, you’ll need to add the token to MetaMask to view it. If you don’t already have the xDai chain on Metamask, here is the information you need to add the xDai network to Metamask.
- Network Name: xDai
- RPC URL: https://rpc.xdaichain.com/
- Chain ID: 100
- Symbol: xDai
- Explorer: https://blockscout.com/poa/xdai
Switch your MetaMask to the xDai chain. Click Assets, then scroll down and click Add Token.
Select Custom Token and paste the address from your newly bridged token. You can find this in a few ways. The remaining fields will populate automatically (Symbol and Decimals). Click Next.
Note: Do not use the search function, as this will search for tokens on the Ethereum Mainnet.
Click Add Token to add it to your wallet on the xDai chain.
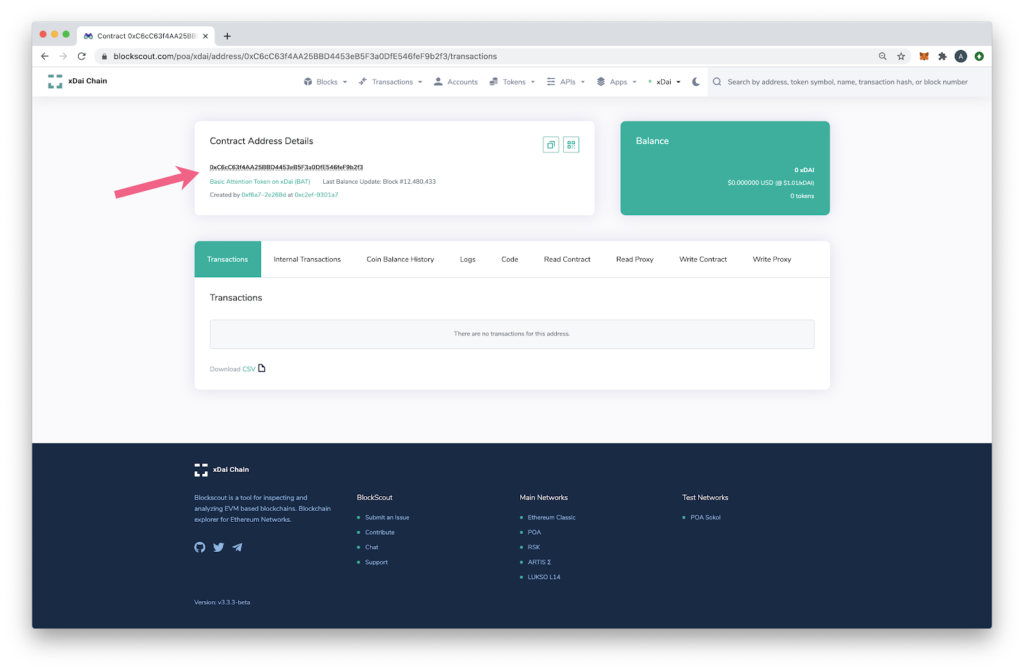
Finding the Custom Token Address on xDai
There are a few ways to find the custom token address on xDai using BlockScout.
- Via your address on BlockScout. Paste your address into the BlockScout search bar and click the token tab to see all tokens associated with your address on xDai.
- BlockScout’s list of bridged tokens. If you successfully bridged a token with OmniBridge, you can find this token here
- Search by token name in BlockScout.

- When bridging, you can click on the executed ALM transaction to find newly minted tokens.
Wish you all successful transfers from Ethereum to xDai. If you have any further questions, don’t hesitate to ask in the Chat Group.
You can see more information here.